Monday, January 24, 2011

The Patience of Smoking Meat


Smoking meat, or barbecuing, is an endeavor that teaches patience, sometimes by trying your patience. At the very least, it requires setting aside hours for cooking even a small piece of meat and it can (and should) entail more preparation than that. For pork, you should give it a dry rub or a marinade the night before (or earlier); for poultry or salmon, you should brine it for at least a day (and maybe soak it in water afterwards to pull out some of the salt now that it has done its moisturizing job) and then rub, marinade, or inject it with seasonings. And these are the things you hot smoke, which is faster than cold smoking (as you would for bacon or cold smoked salmon).

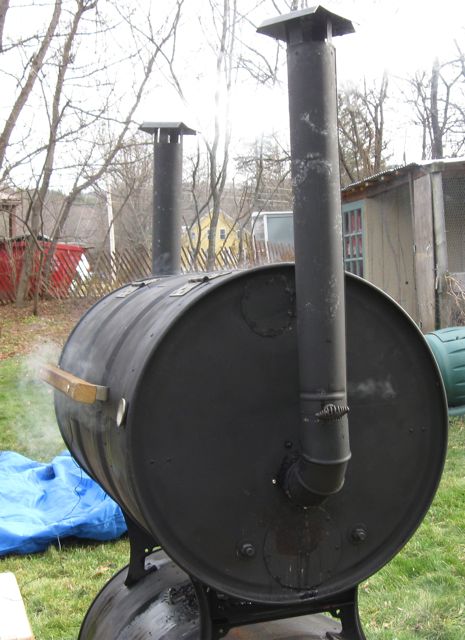
As you might imagine, the work that I recently put in to make my own smoker and the subsequent time dedicated to the art of smoking has given me some time to think about patience (and some exercise in practicing and trying it). Patience is part of the fruit of the spirit (fruit is singular in Galatians and denotes that all those things listed are part of one thing that should all be present in a persons life). As our pastor noted in a recent sermon, we shouldn't confuse a natural inclination toward a particular aspect of the fruit of the spirit with the work of the spirit itself. The distinction should be that the work of the spirit manifests itself to some degree in all the things listed as part of the fruit of the spirit.

I tend to be a pretty laid back and pretty patient person by nature, which makes me well suited to the art of barbecue. I hope part of that is the work of the Holy Spirit in my life producing fruit, but a significant (and probably larger) part of it is a natural aversion to conflict and confrontation, rooted mainly in a desire for acceptance. That's the part of me that sees my rising temper and says, "Getting angry or frustrated will not help me achieve the selfish desire for which I am striving, so I better cool off." This is not altogether a bad inclination and it is certainly not an illogical one, but it is rooted in selfishness. If the spirit is working in me to increase my patience, it is by teaching me to that I don't need to get angry or frustrated because God works all things to the good of those who love him and by the grace of Christ, I am included in that category. That kind of teaching will also increase in me the tendency to love, joy, peace, kindness, gentleness, and self-control in addition to patience.

In smoking, experience teaches patience by a very practical method: The longer you smoke the meat, cheese, fish, or whatever else you're smoking, the more the smoke flavor permeates the food. There is a natural satisfaction in saying, "I cooked this pork shoulder for 10.5 hours and boy does it taste like it." I just need to keep reminding myself that the time I am spending is not just for making good food (though to be honest, that is much of my motivation), but also that I can spend my time freely knowing that God will give me the time I need to do the things that I need to do. Now I just have to remember that I shouldn't confuse the things I need to do and the things I want to do . . .

Here is a snapshot of things that I have smoked. As always, pork tenderloin is small enough to take only 3 hours or so to smoke:

That pink area is called the smoke ring. It's cooked (the inside is white), so there's no danger in the pink.

A good friend helped me pick up the applewood in his truck, so I promised him some smoked salmon. We smoked two so we could have one too. It was hands down the best salmon I've ever eaten (only slightly photoshopped to remove the glare of the flash).

After this I apparently decided to go into the catering business. Some college students decided to host a barbecue for the entire church at their house (across the street from the high school where we meet) and I let it be known that I had a smoker and could cook enough pulled pork for the entire congregation. So here's 63 lbs of pork shoulder that smoked for 10.5 hours (before and after). We counted around 140 people and we had about 1/4 of the pulled pork left.
That blackened part isn't burned, it's delicious, spicy bark. You cook the pork shoulder until it flakes apart with the turn of a fork.

Of course, we had to smoke the turkey since we were hosting Thanksgiving dinner.
We also smoked some salt in the tin foil pan you see pictured (which we'll keep smoking whenever we smoke so that it eventually is smoked for days and will have a wonderful smoky flavor).

We have also smoked cheese. This obviously requires much lower temperatures, so it helps if there's snow on the ground. Cheese only takes 45-60 minutes to get a good smoky flavor as long as you leave it out in the air for an hour or two prior to smoking to develop a rind that will take the smoke.
The reddish block in the back right was rubbed with paprika for added color (there was some mention of doing this online, but I'm not sure it was worth the trouble).

We subsequently waxed and labeled the cheese (including nutrition facts on the back). We gave some of it as gifts for Christmas and kept some for ourselves. You can clearly see the paprika block that we kept for ourselves.
There will be much more to come. In addition to other meats that I have yet to smoke, my wife has started making hard cheese and as soon as we can dig the smoker out of the snow, we'll be smoking some of that.

Wednesday, December 22, 2010

Building a New Meat Smoker

Brief update on my life: Since I last posted I got a new job in railroad consulting and bought a house. Although we didn't buy a "fixer-upper", we have stayed busy with the house. Our projects to date include spackling two entire rooms (to cover textured walls), painting four rooms, adding electrical outlets, wiring overhead lights upstairs, replacing a hot water heater, raising the attic floor by eight inches, blowing eight inches of additional insulation under the newly raised attic floor, and replacing a couple interior doors, among other things (including a ridiculously large garden that my wife tends). As such, I've neglected my writing.

Luckily, my lovely wife helps me chronicle my adventures in pictures, so all is not lost as to this busy time in my life. One of my many adventures has been, now that we have our own place, to build a bigger and better meat smoker.There were many considerations that led to this project. First, my previous homemade smoker has some shortcomings, both is size and in reliability (I was rewiring it almost every time we used it). Second, I had long toyed with the idea of building bigger and better smokers of various kinds whose designs can be found all over the internet. Third, I came across someone on Craig's List who had downed a very old apple tree and was looking to get rid of about a cord of apple wood for a good price (for the uninitiate, a cord is the amount of wood that would fit in a stacked pile with dimensions 4'x4'x8'). Fourth, I came across someone selling food grade 55 gallon drums for $8 each (both steel and plastic) and was able to convince my wife that I could get a couple of plastic drums to make her a pair of rain barrels (which I did) and also get a couple of metal drums to make a meat smoker.

Having found a couple of steel drums determined for me the type of smoker I was to build: The Big Baby. The Big Baby uses a couple kits that are designed to turn a pair of steel drums into a cheap woodstove for camps and workshops (they're not the prettiest stoves). Here are a couple of other people who've documented the idea and here are some pictures of the progress.

First came the platform, made from a couple of pressure treated deckboard (1.25"x6"x8') with a generator wheel kit adapted to give it wheels on one side and some short legs made from 1" square aluminum tube with rubber feet.


Then the bottom barrel goes on a pair of legs and serves as the firebox. The bottom is lined with fire bricks to keep the bottom from quickly rusting out.


Then the top barrel goes on and serves as the smoke chamber/grill. There is a hinged door cut with some metal riveted around 3 sides of the doorway to catch the door and reduce the amount of smoke that gets out through the cracks. There is also a homemade handle made from a 1"x1" pressure treated board and some square aluminum 1" tube. Next to the door you can see a pair of grill thermometers stolen from my old smoker. The grill is just some expanded metal grate sitting on top of pieces of angle iron riveted along the inside walls of the top barrel.


The 3" vent pipes coming out of the both sides of the top barrel came from the old hot water heater. On top of these smokestacks there are homemade chimney caps made from some scrap metal found in our new basement. Also made from that scrap metal was a baffle, that sits in the top barrel (just above the bottom of the barrel, suspending by a pair of threaded rods that run across the drum for that purpose) to disperse the heat and smoke from the firebox, but there is no picture of that. The baffle also serves to have a flat place under the grill to put a water pan and/or catch the drippings.

Obviously, God has been gracious to us in giving us the creativity with which to build such things, as well as the room to keep such a large contraption and the friends and family with which to share the wonderful food we can cook on it (and have cooked on it already, but that is a topic for another post . . .).

Some notes on the process for those who are interested:
  • The barrels were sandblasted inside and out by a local guy to remove the existing paint and interior coating (and some rust), then they were repainted with stove paint that's made to take the heat.
  • I added some makeshift dampers on the back of the bottom barrel by drilling holes in circular pieces of metal and riveting them to the drum and then drilling holes in the barrel to match. With a little wooden handle, the riveted circle spins and allows more air into the firebox. Before doing this, I had some trouble keeping the fire going since the only other air inlet is a small damper built into the stove door. Even now, the fire doesn't rage, but that's a good things for smoking.
  • Some stove cement was used around the collars, stove doors, and vent pipes, but I never was able to get it to cure properly and most of it has cracked and fallen away. The directions on applying it tell you to spread it on and "slowly heat the cement to 500 degrees". It doesn't specify exactly what it means by "slowly" or exactly how to heat it.
  • If I were to do it again, I'd probably put another pair of wheels on the other side of the platform (ones that could rotate, like the ones on those deck mowers) since it is a little heavy to lift and shove around the yard. Maybe next year I'll make some modifications
  • In this same vein, I added a pretty heavy duty hand made with 2x6 boards and heavy lag bolts for lifting the side without wheels. It also serves as a small platform to set things when smoking, but I usually also bring out a folding tv tray. In the future I may build a better platform around the smoker for staging.
  • I would also make the platform a little wider. It has once blown over and required a little banging to get the door back in shape. We've also turned it so that the normal wind direction doesn't hit it broadside.
  • I would be remiss if I didn't also mention the cover that my wife made for it by sewing together three small tarps to fit. You can see an image of it on her blog here. I did well in finding a wife, but I'm sure you knew that already.

Tuesday, April 21, 2009

My Homemade Meat Smoker Part Deux


In response to some interest over the smoker, here's a picture of the resulting pork tenderloin (you can click on the image for a larger, more mouth-watering version - my wife took the picture). I marinated it overnight, then put a simple rub on it (black pepper, salt, cayenne pepper & onion powder) and rolled it in crushed cashews. Unfortunately there was a little too much cayenne pepper in the rub and it overpowered the marinade and the cashews too (you could still taste the cashews just a little once you got used to the spiciness). It was still delicious, just spicy and delicious. God is indeed very good.

And it's no use asking for leftovers: There aren't any.

Saturday, April 18, 2009

My Homemade Meat Smoker

This is another post in a similar vein to the one before it. That is to say that it is a post about creativity. In this case, the creativity of myself and some friends in building a meat smoker. In case you missed the previous post and are too lazy to go back and look at it, the summary is that we are creative because God is creative and we are made in his image. I thank God for his creativity not only in my own case, but especially for the creativity of the man who came up with the supremely God-like idea to smoke meat (and I think that the odds are pretty good that it was a man).

A while back (a couple of years ago now) some culinarily adept grad student friends of mine and I came up with a somewhat harebrained scheme to build our own meat smoker. The basic idea is that you take a metal trash can (new, not used), put a hot plate in the bottom with a box of hardwood chips on it (soaked in water so they last longer and steam as well as smoke), put some meat near the top, and let it cook for several hours (ideally somewhere around 215-225 degrees Fahrenheit). I think it's just about the best way to cook meat. After building it, I sort of inherited the smoker and have used it periodically to cook ribs, pork loin, and several turkeys.

Of course, the details are a little more complicated than the simple picture painted above and over the course of the years, there have been some necessary adjustments to the smoker. Here are two pictures of the smoker (top on and top off):


Some of the first things to notice are the temperature gauge on the top (you need to know how hot it is in there - there is a second thermometer on the side), the door at the bottom (for adding more wood chips without lifting the lid and losing all the heat and smoke), and the wood blocks on the side (they are attached to the screws that hold the brackets that hold the grill grate - otherwise there would be screws sticking out of the side of the can). You can also see those brackets and the hot plate in the second image. There are two levels of brackets so that you can put a pan of liquid underneath to keep the meat from drying out or to put the meat closer to the heat if need be (the temperature is usually 20-30 degrees warmer at the lower brackets).

Warning: From here on out, the post may get a little technical. If you're not interested in the details of how to make a smoker or the technical challenges involved, you can just stop reading.

Now that we've lost all those boring, non-technical people, lets get to the interesting part. All of these things were in the original smoker design. The changes have all happened to the hot plate. It turns out that hot plates are not designed to be kept on for long periods of time in enclosed spaces. In fact they are designed to shut off if the temperature gets too hot (this is also how our hot plate was designed to regulate the heat). This is, in general a good thing. For a meat smoker, it is a bad thing. There were a couple of different variations we tried on bypassing the switch before settling on the simplest solution of directly wiring the plug to the hot plate with no other internal components whatsoever. This means that to "turn on" the smoker, you plug it in and to "turn it off" you unplug it. One of these days maybe I'll put in a switch. We also took out the body of the hot plate and mounted the heating element onto one of those metal wiring boxes (the kind that light switches are mounted on) just to make sure that there was no plastic to give off strange fumes.

This was more or less the way the smoker stayed for a couple years with one small, recurring problem: The wires just underneath the hot plate would periodically get brittle and break from the heat, effectively turning off the hot plate. If you really care to know, copper wire apparently has some oxygen in it (unless you pay a lot of money for pure copper wire). This oxygen when heated, reacts with the hydrogen in the air to form water which in turn evaporates into steam, leaving behind small holes and weakening the copper wire (end science lesson). It was never a huge deal, but whatever I would be cooking at the time would have to be finished in the oven. Now that I have time on my hands, I decided it was time to solve this problem. Being unemployed and on a tight budget, I also decided to solve the problem with whatever I had on hand.

So here is the task: I need to get the electrical current from outside the can to the hotplate without using copper wire (at least inside the can). My solution: use steel bars instead of wires and connect it using the wiring used for electric fences. Of course, this creates some other complications, mainly keeping the steel rods from blowing a circuit by touching the metal trash can (or each other). The only steel rods I had were rectangular (about 1" x 1/8"), so I had to cut away some of the metal box on which the heating element is mounted to give the rods a little room. I also ran them through a couple of pieces of wood (hardwood so that any smoke won't hurt) so that they wouldn't touch the bottom of the can or each other. On top of those pieces of wood, we placed a piece of glass to shield the bars from any dripping that might cause similar problems, (my father-in-law cut the glass for me). Here you can see some of that work (the slant of the glass is intentional to keep the drippings away from the steel):


On the left you can see through the door of the smoker to the hot plate and the pieces of wood and glass behind. You can also see the bar magnet in the foreground that keeps the door shut (it's sticking out of the right side of the doorway). On the right, you can see the underside of the hot plate where most of the electrical box has been cut away to make room for the steel bars.

Now that I've got it back together and working, there's a pork tenderloin in the fridge that's just asking to be smoked. We'll see how the new wiring holds up.